

Estimated reading time: 16 minutes
Getting Started with Dubstep Mixing
What’s up everyone? Subterranean here, and today we’re gonna learn how to construct and mix down an average dubstep song. Please note that this is not a video on how to make a dubstep song in general, although you may get some help on that subject from watching this. I also won’t dissect how I made a lot of these bases and leads as this isn’t that type of video. But if you download the full Ableton project file, you can open up the sounds and see how they were made.
And I’d also like to point out that this song does not represent my full producing abilities. I made this song purely as an example for this video and as such it’s far more simple than the music you’ll find on my SoundCloud. So here’s the fully constructed, arranged, and mixed-down track.
Table of contents
Creative Song Construction Tips
No mistake, I shake keep in mind that these aren’t rules that every dubstep song should follow. I actually encourage taking this song construction that I already have and tweaking it and straying away from it. And I’ll give some examples of that as I explain the construction of this song. So our song starts out with this little intro.
Layering Elements in Your Tracks
You can hear that the super sol lead is low pass and then it gradually turns up, revealing more of the sound and the kick and the snare do the same thing.
Drum Fills for Texture
One thing you’ll notice with the drums is that on a lot of these BR parts where there’s nothing going on with the synths, we have these drum fills. I recorded these drum fills with Addictive Drummer and exported them out to be used in this project file. I highly recommend adding interesting drum fills either by using a drum plugin like Addictive Drummer, or maybe a librarian contact, or maybe just getting a sample pack with some drums in it and arranging fills from there, or even just going to a sample pack which has live drum fills.
No matter what method you choose, I highly recommend adding these types of drum fills all throughout your song because it fills up the dead air and makes it less awkward to listen to. And it also gives a track some room to breathe because there’s not synths going around everywhere.
Adding Effect Sweeps
One thing you might also notice about this song is that there are effect sweeps going on throughout the majority of it. You can see that throughout the whole construction of this song, we have this sequence of sweeps.

I actually made these sound effects myself by loading up white noise and operator and then using a variety of effects like reverbs and filters to make an interesting sweep sound. Solo that so you can hear it. These are a little bit hard to notice when they’re not isolated but they really add a lot to the song.
And again, keep it from getting boring. That’s a tip I have for producers, regardless of what genre of music they’re trying to make. Always have small layers going on in the background, whether they’re effect sweeps or synths, which are quiet and layered underneath.
Adding Layers and Effects
The more prominent synth sound. Having multiple layers in your music really gives it that professional sound. It makes the listener want to repeatedly listen to the songs to hear new things. As far as my other effects go, I also have this little impact shot which I’ll solo out right now.
Creating Unique Sound Effects
This sound effect occurs whenever there is a breakdown in the song. And I actually made this sound by taking a gunshot, adding a lot of reverb to it, and then using EQ Eight to filter out all the high end. So we get that nice low thump.
It’s very important to note that while you can make sound effects yourself, like I’m doing, or modify existing sounds to make them more interesting, feel free to also go through some sample packs and find pre-made samples that work as well in your songs.
Sometimes this can save from the hassle of trying to make new sound effects. Or if you want, you can use those as a placeholder before you make the sound effects. And the last effect I’m going to go over is this little reverse sweep.
Crafting Sweeping Sounds
This is another sweeping effect I made. This time, I took the sample, which was originally going down in volume, and I reversed it so it goes up in volume. I also pitched it up to give it that sort of weird stretch sound, which I like. And in case you can’t notice:
- Sweep Effect in Action: I actually have this in the build-up right before the vocal sample, which we’ll get to in a minute. Adding these sorts of sweeping up effects to your build-ups works really well. It makes you anticipate the drop more.

Because you’re adding a lot more intensity to the build-ups. And once again, it’s adding more layers to the song. I’ll discuss more elements of the song in a minute. But let’s get back to the arrangement. So after this intro, we have this section.
Keywords: synth sound, multiple layers, professional sound, sound effects, breakdown, gunshot, reverb, EQ Eight, low thump, sample packs, pre-made samples, reverse sweep, build-up, intensity, vocal sample.
Song Arrangement and Marking
And that goes on until here. And this could be described in more traditional music terms as kind of a verse. So if I was going to compare the construction of this song to the construction of a more typical pop song, I would say this is obviously the intro.
And then this little part with just the synth would be considered the verse. And then this could be sort of a breakdown or a bridge. And then this drop would be the chorus. One thing that makes constructing these songs really helpful and in general can save time when you’re making music is to add locators.

To do this in Ableton, you go to a bar of the song and you right click about up here. You click Add Locator. And there’s our locator. We’re going to name this one intro because this is the first one. And we’ll drag this all the way to the beginning. By doing this, you can mark parts of the song easily.
This makes it easier to construct your songs. It also means you can jump through parts of the song and get to parts you want to fix or work on quicker without having to dig for them. So now that we’ve got the intro, we’ll just call this the verse.
Move that over. And then this part would be the breakdown slash buildup. I’ll just call it breakdown. Before I elaborate more on the breakdown, I’d like to discuss this one part of the verse.
As you can hear, we took a dubstep growl that we’ll later be using in the drop, and we transposed it into the verse to add a segue into the breakdown. Just like we did with the fills. This is something I really recommend for getting rid of that dead space without having the song sound obnoxious with playing the same synth over and over again.
And it also works really well for transitioning to different parts of the song. Now we have the breakdown. And as you can see here, we’re playing the same melody that we were playing through the verse. But this time, we’ve looped it to not play the whole melody. And we actually did that in the intro as well.
One thing that we dropped in the breakdown that we had in the verse was this little saw bass, as I’ve called it. This is a very interesting sound that sort of fills up a little bit of gap with the mid bass. Because the sub bass that we’ll get to later is taking care of all the low bass. And of course, we have the frequencies taken up by the typical Skrillex-sounding basses in the drop. But in the verses, it could be kind of bland to not have any real mid bass going on.
So to remedy that, I took a saw wave in analog and I detuned it and played it at a low octave. Then, I went into EQ Eight and removed some of the lower end bass that the sub would be taking care of. Then I removed a lot of the high frequencies. And now we have this kind of mid-range bass.
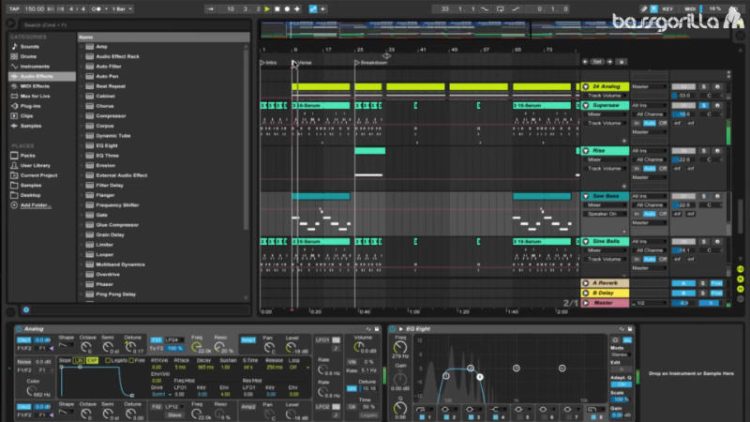
Layering Synths for a Rich Sound
This might be a little bit hard to hear if you’re watching this on laptop speakers. So you might want to get a good pair of headphones. Or some good studio monitors. Now, usually when I’m making synths for a song of this nature, I would take multiple synths.
Which might have kind of a similar sound. And some of them that might be completely different. And then layer each other. Some of them more quiet and some of them louder. But seeing how this is just an example track.
And seeing how some people out there might not have the best CPUs, we left it simple by having a super saw that I made in Serum.
Very basic, trance-like sound. And an operator. I took a sine wave, played it at a high octave. And I turned off the sustain. And gave it a short decay.
And I made these little sine wave bell sounds. See, I also put on some reverb and some EQ eight. To get rid of the low frequencies. Now, another synth that I put in this song. And this is a very minor but important part of music.
That a lot of people overlook. Is having very quiet synth arpeggios in the background. In Analog, I made another super saw type sound. And gave it a short decay. And I played it at a very high octave.
And I have this. In playing this very short, arpeggiated melody throughout most of the song. We’ll some of that so we can hear it.
It’s very quiet and very subtle. But it’s also extremely important.
Because, again, it’s adding more layers to the song. Keeping things interesting. And it’s keeping some more melody in the song.
So when the drop hits, there’s not just chaotic bass going on. There’s still a little bit of melody there to give the listeners some comfort. And if you’re wondering why we have some blank MIDI tracks floating around. We’ll explain that much later.
Creating the Drop and Build-up
Now, let’s focus a little bit more on the breakdown and build-up. Breakdowns are pretty self-explanatory. Parts of the song get stripped away, and then they fade back in. Or new ones come in.
They build more anticipation for whatever will come next. In our case, it’s the drop. If you want your songs to be longer, you might want to have a breakdown be separate from the build-up. But we’re making just a short three-minute song here.
So having the breakdown and the build-up occur at the same time will work. A very important part of build-ups is to have a lot of rising sounds, like that sound effect sweep I showed you earlier. And another great way to do that is to have synths that rise in pitch. Like this one that I made.
I made this in Operator. It’s just two sine waves and then me playing with some curves and making my oscillator there, taking those sounds and putting them together.
Some people might like to use a saw wave for their build-up noises. It just kind of depends on the sound you’re going for. I have this little arpeggiator over here that’s just giving that stuttery effect. If we turn that off, we just have a more straightforward riser that works well, too. But I like to put the arpeggiator on to give it a more distinct sound.
And that little jittery effect creates some more tension, which, again, works really great for build-ups. And then we’ve got some reverb just to make the transition into the vocal sample and then into the drop a little bit smoother.
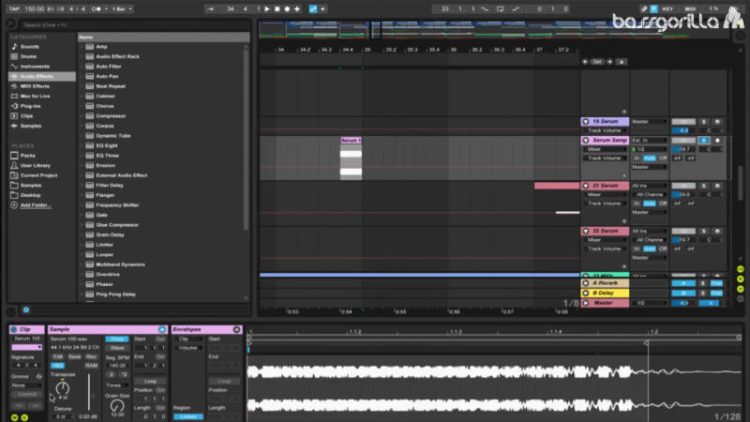
Now let’s look at the drop. We’re gonna add a locator, and we’ll call this drop. This drop, like a lot of dubstep songs, has two parts to it—one at 33 and another one at 49. You might want to add a locator for drop part one and drop part two. But seeing how they’re not all too different, I just like to have one locator for the drop. In general, our drop right now sounds like this.
Crafting and Mixing Dubstep Basses
When creating dubstep tracks, there’s a significant focus on crafting unique bass sounds and effectively mixing them into the song. I’ll walk you through some techniques and considerations in this process.
Processing and Resampling Basses
I’ve added specific processing to several of the basses in this track, though I won’t delve deeply into each technique.
Some basses have no processing and were resampled from earlier compositions. Resampling is highly recommended because it lightens the CPU load, especially when working with complex sound designs. This approach can make managing volume and editing sounds much easier.
Benefits and Downsides of Bouncing Down Basses
Bouncing down your bass tracks to audio has its advantages, like easier volume management and removing unwanted feedback. However, you lose flexibility in modifying the sound. Extreme pitch adjustments, like shifting a bass up 24 semitones, can result in unnatural effects. Sometimes, though, time-stretching can yield interesting results with experimentation.
Adding Dimension and Handling Feedback
Some sounds have reverb and OTT, adding depth without overcomplicating the mix. For simpler songs, heavy processing isn’t always necessary. The growls often feature vocoders, giving them a unique texture, and all these bases predominantly come from Serum.
To conserve CPU space, I frequently bounce bases down and then fade out any feedback. For instance, a filler sound used in the drop is simple yet crucial for maintaining the energy of the track.
Consistent Song Structure
Maintaining a consistent feel throughout your song ensures it doesn’t seem randomly assembled. By integrating parts of the verse melody into the drop, the song gains a cohesive flow. Repetition, especially in electronic music, can be essential for a predictable and enjoyable listening experience. After the drop, we transition into another verse, bringing the structure full circle.
Crafting the Perfect Drop
Now, this is where the construction of the song can vary depending on what you’re trying to make. You might want to go into a complete breakdown and then have a part that’s similar to this verse. And then go into a breakdown buildup and then into a drop instead of heading just straight into a verse. You might also want to make a drop that’s shorter by cutting out the second half and then going straight into the verse if you want a very streamlined song. But for this song, we’ll go back into another verse after the second half of the first drop.

Then we’ll go into a buildup breakdown, which is basically the same as the first one. We’ll just call that breakdown. And then we’ll be going into the second drop. Just call that drop two. For the second drop, I didn’t really change much from the first drop. For the first quarter or so of the second drop, I have the drums going in double time to give it a sort of ravish feel.
And then it switches back to the regular drums. In the second half, there are some changes in the arrangement, but there’s nothing too major. Whether you want to make your second drop exactly the same as the first, have subtle changes, or create a different drop by keeping some of the same sounds but introducing some new ones, it’s all up to you. That’s one thing I want to get across with this video: there’s no real right or wrong way to construct songs, unless you have beats that don’t match up or keys that don’t match.
As far as the actual construction of the songs, the only right way is the way you feel the song should sound. After the second drop, we have a little outro. For the outro, I copied parts of the intro. I have the same melody loop going on but took out the kick and snare, rising up with the low pass. And then after those synths are done playing…
Related Posts
- Serum Tutorial: Super Growl Bass in Ableton Live
- Serum Tutorial: Snails Bass (Hybrid Trap/Dubstep Bass)
- Future House / Deep House Bass Tutorial In Ableton Live
- Bubblegum Bass Tutorial in Ableton Operator
- Serum Tutorial: Chiptune Lead Synth
- Future Garage Vinyl Noise Effect In Ableton Live: How to Create an Effect
- Glitch Hop In Ableton Live With Slynk – Track Walkthrough
- SLYNK Interview – Glitch Hop Tutorial
- Ableton Tutorial: A Complete Guide to Ableton Live
FAQs
The tutorial focuses on how to construct and mix a dubstep track in Ableton Live. It emphasizes layering, effect sweeps, and transitions, offering tips on structuring the track, but does not deeply cover sound design techniques for creating specific bass or lead sounds.
Layering helps to create a more dynamic and professional-sounding track. Adding multiple subtle layers, like background effects or quiet synths, makes the song more interesting and encourages repeated listens to discover new elements each time.
Drum fills and effect sweeps add texture and keep the song engaging. Drum fills prevent dead air, making transitions smoother, while effect sweeps build anticipation, particularly during the buildup to the drop, intensifying the listener’s experience.
The tutorial suggests techniques like loading white noise with an operator and applying reverb and filters to create sweeps. For unique effects, using resampled sounds or modifying gunshot samples with reverb and EQ are recommended approaches.
Effective build-ups should include rising sounds, pitch-modulated synths, and layered arpeggiators to create tension. Drops should maintain energy, using carefully layered basses and melodies from previous sections to ensure the track has flow and cohesion.